
In this blog post, we are going to see how to control the fan speed/RPM of Antec Prism ARGB 120mm fans on a MSI X570 Tomahawk Motherboard. Having said that, the process should be similar for other fans and motherboards.
There are two ways you can control the fan speed (RPM) in your PC:
- Via your BIOS.
- With the help of a software (Dragon Center for MSI Motherboard).
Before we dive into how to control the fan speed, we should be aware of the two modes the fan operates in – PWM and DC. PWM fans are DC fans but with an extra wire for PWM. The PWM fans are 4-pin fans whereas DC fans are 3-pins. The PWM fans allow for a seamless and high-precision control whereas the DC fans lack precision as their speed is controlled by varying the supplied voltage. In my case, the Antec Prism fans are PWM fans so I can precisely control what speed I want them to run at.
Via your BIOS
You can open the BIOS Dashboard in either of the two ways:
- Press and hold
Shiftkey and then click Restart. - Press
F2orDeletekey when your PC is botting up (the keys maybe different depending on your motherboard).
Once you enter the BIOS, you can look for Fans, select PWM mode, and then finally adjust the speed-to-temperature graph ensuring that the Smart Fan Mode is turned on. If you choose DC mode then you can only adjust the supply voltage. You should bear in mind that you can’t reduce the voltage below a certain threshold and therefore, you can’t really slow down the speed to a minimum such that you hear no noise. You have to choose PWM mode if you really want the speed to go down (like 10% of the max speed or so). After doing the changes, you can save the new configuration and start using the pc. You should notice the fan speed change instantly or after saving the configurations.
With a software like Dragon Center
If you prefer a simpler way to change the fan speed then doing so via a software would be the way to go. As I have a MSI motherboard, it made sense to me to use the software by MSI. Generally speaking, the software by MSI are the best I’ve have used so far. So, if their software works for your motherboard then I would suggest using it if you don’t like the software from your own brand.
Having said that, before using any software, you should make sure that the fan mode is set to PWM in the BIOS otherwise the speed that you adjust in the graph won’t have any affect. Only DC adjustments would work.
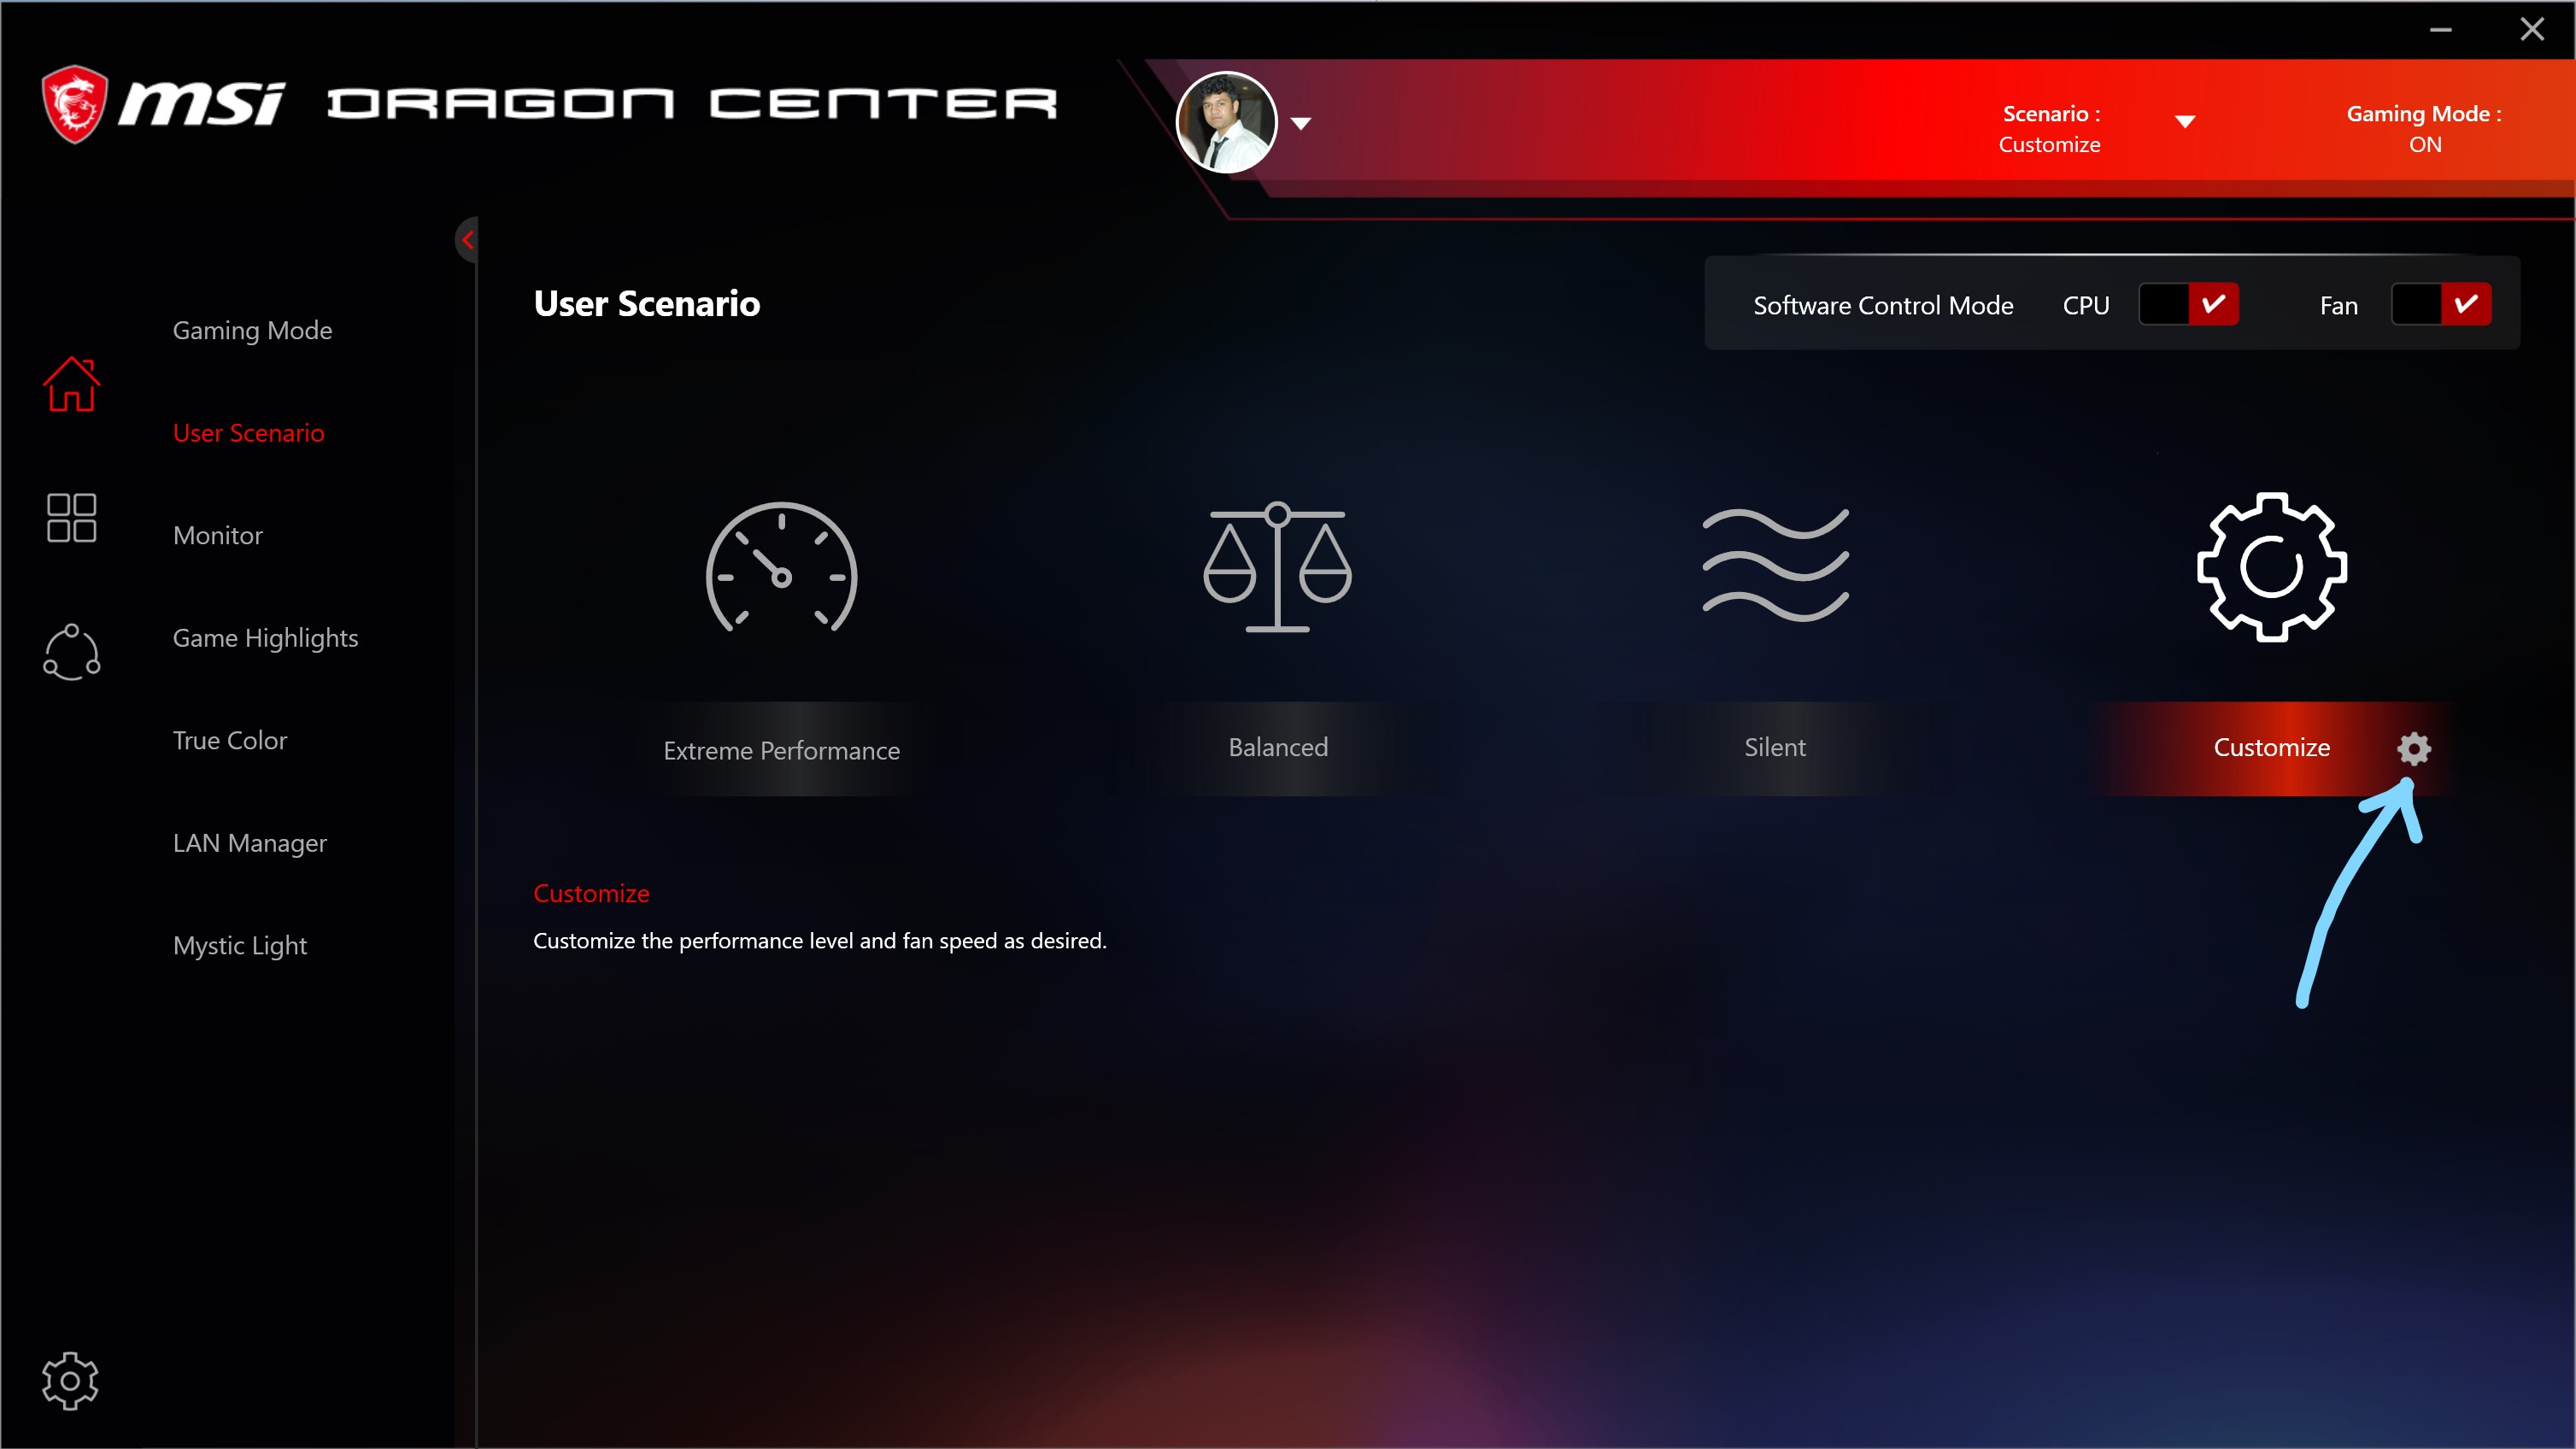
Open up the Dragon Center app and click on User Scenario. Finally, click the cog icon under Customize as shown below:
Note the pins on the motherboard where you attached your fan pins to. In my case, I have nine fans in total and have used CPU Fan1, PUMP Fan1, and SYS Fan 4 on my motherboard. The same is shown on the next screen below:
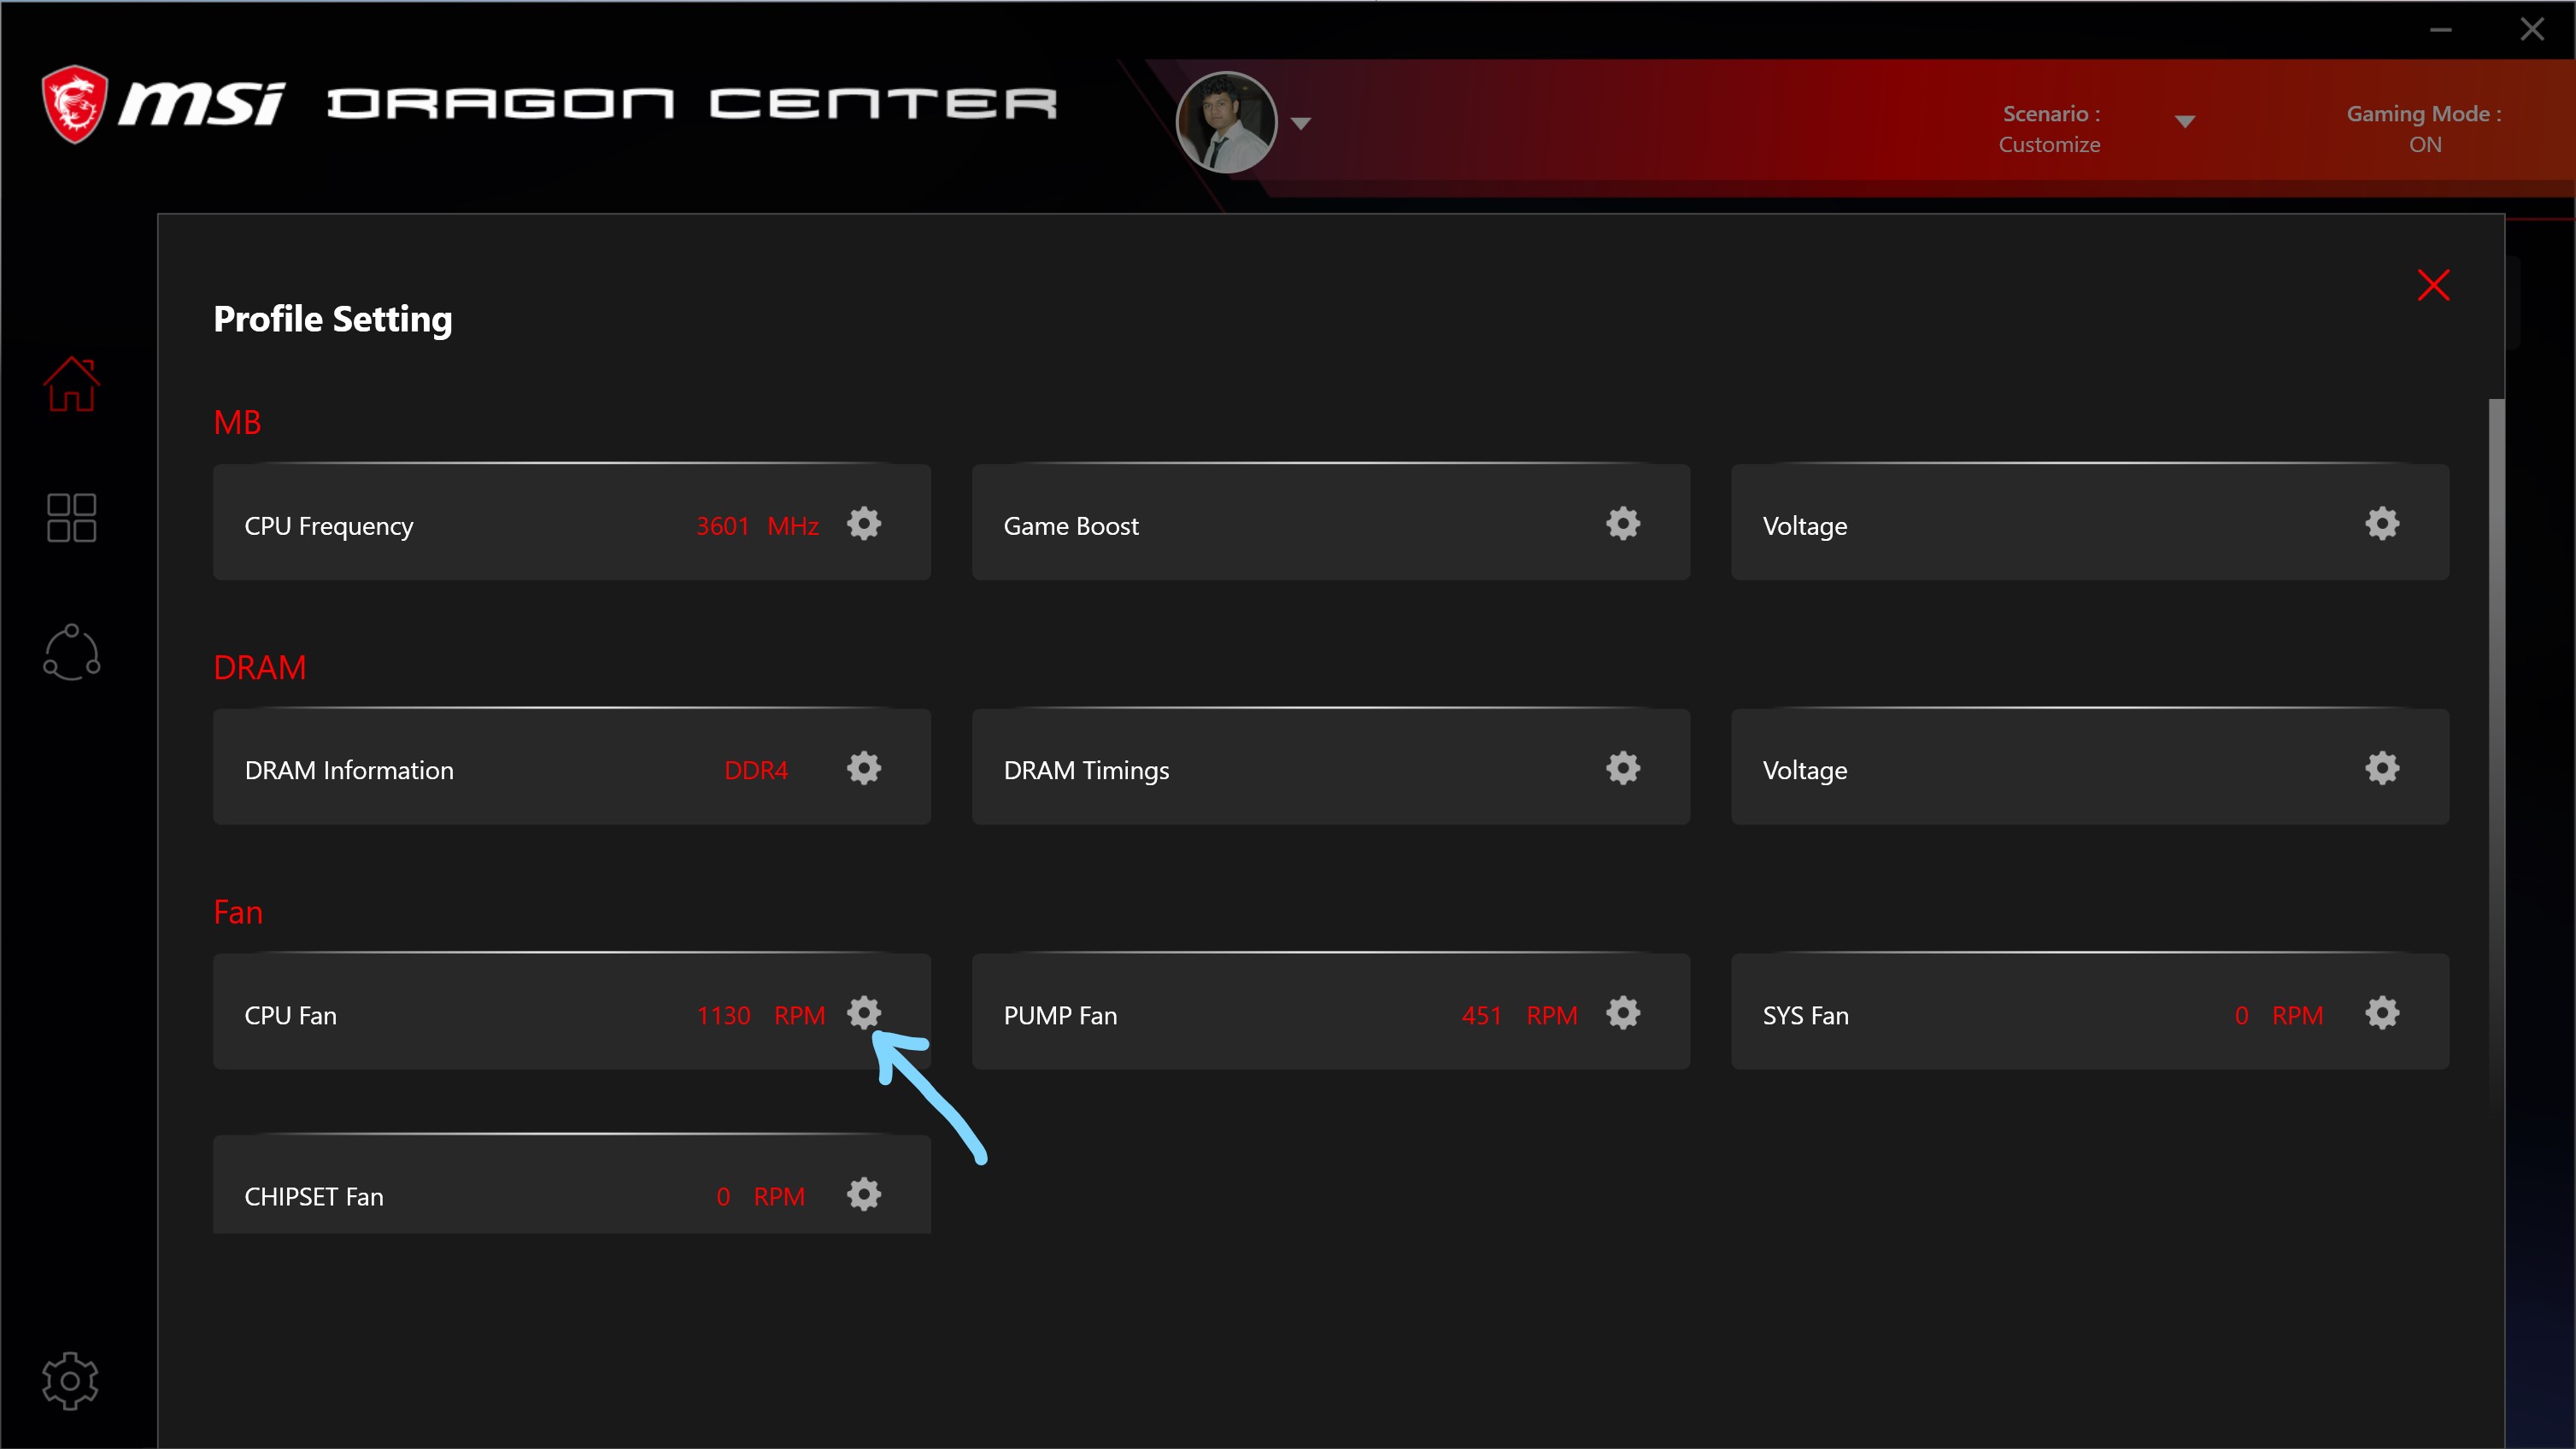
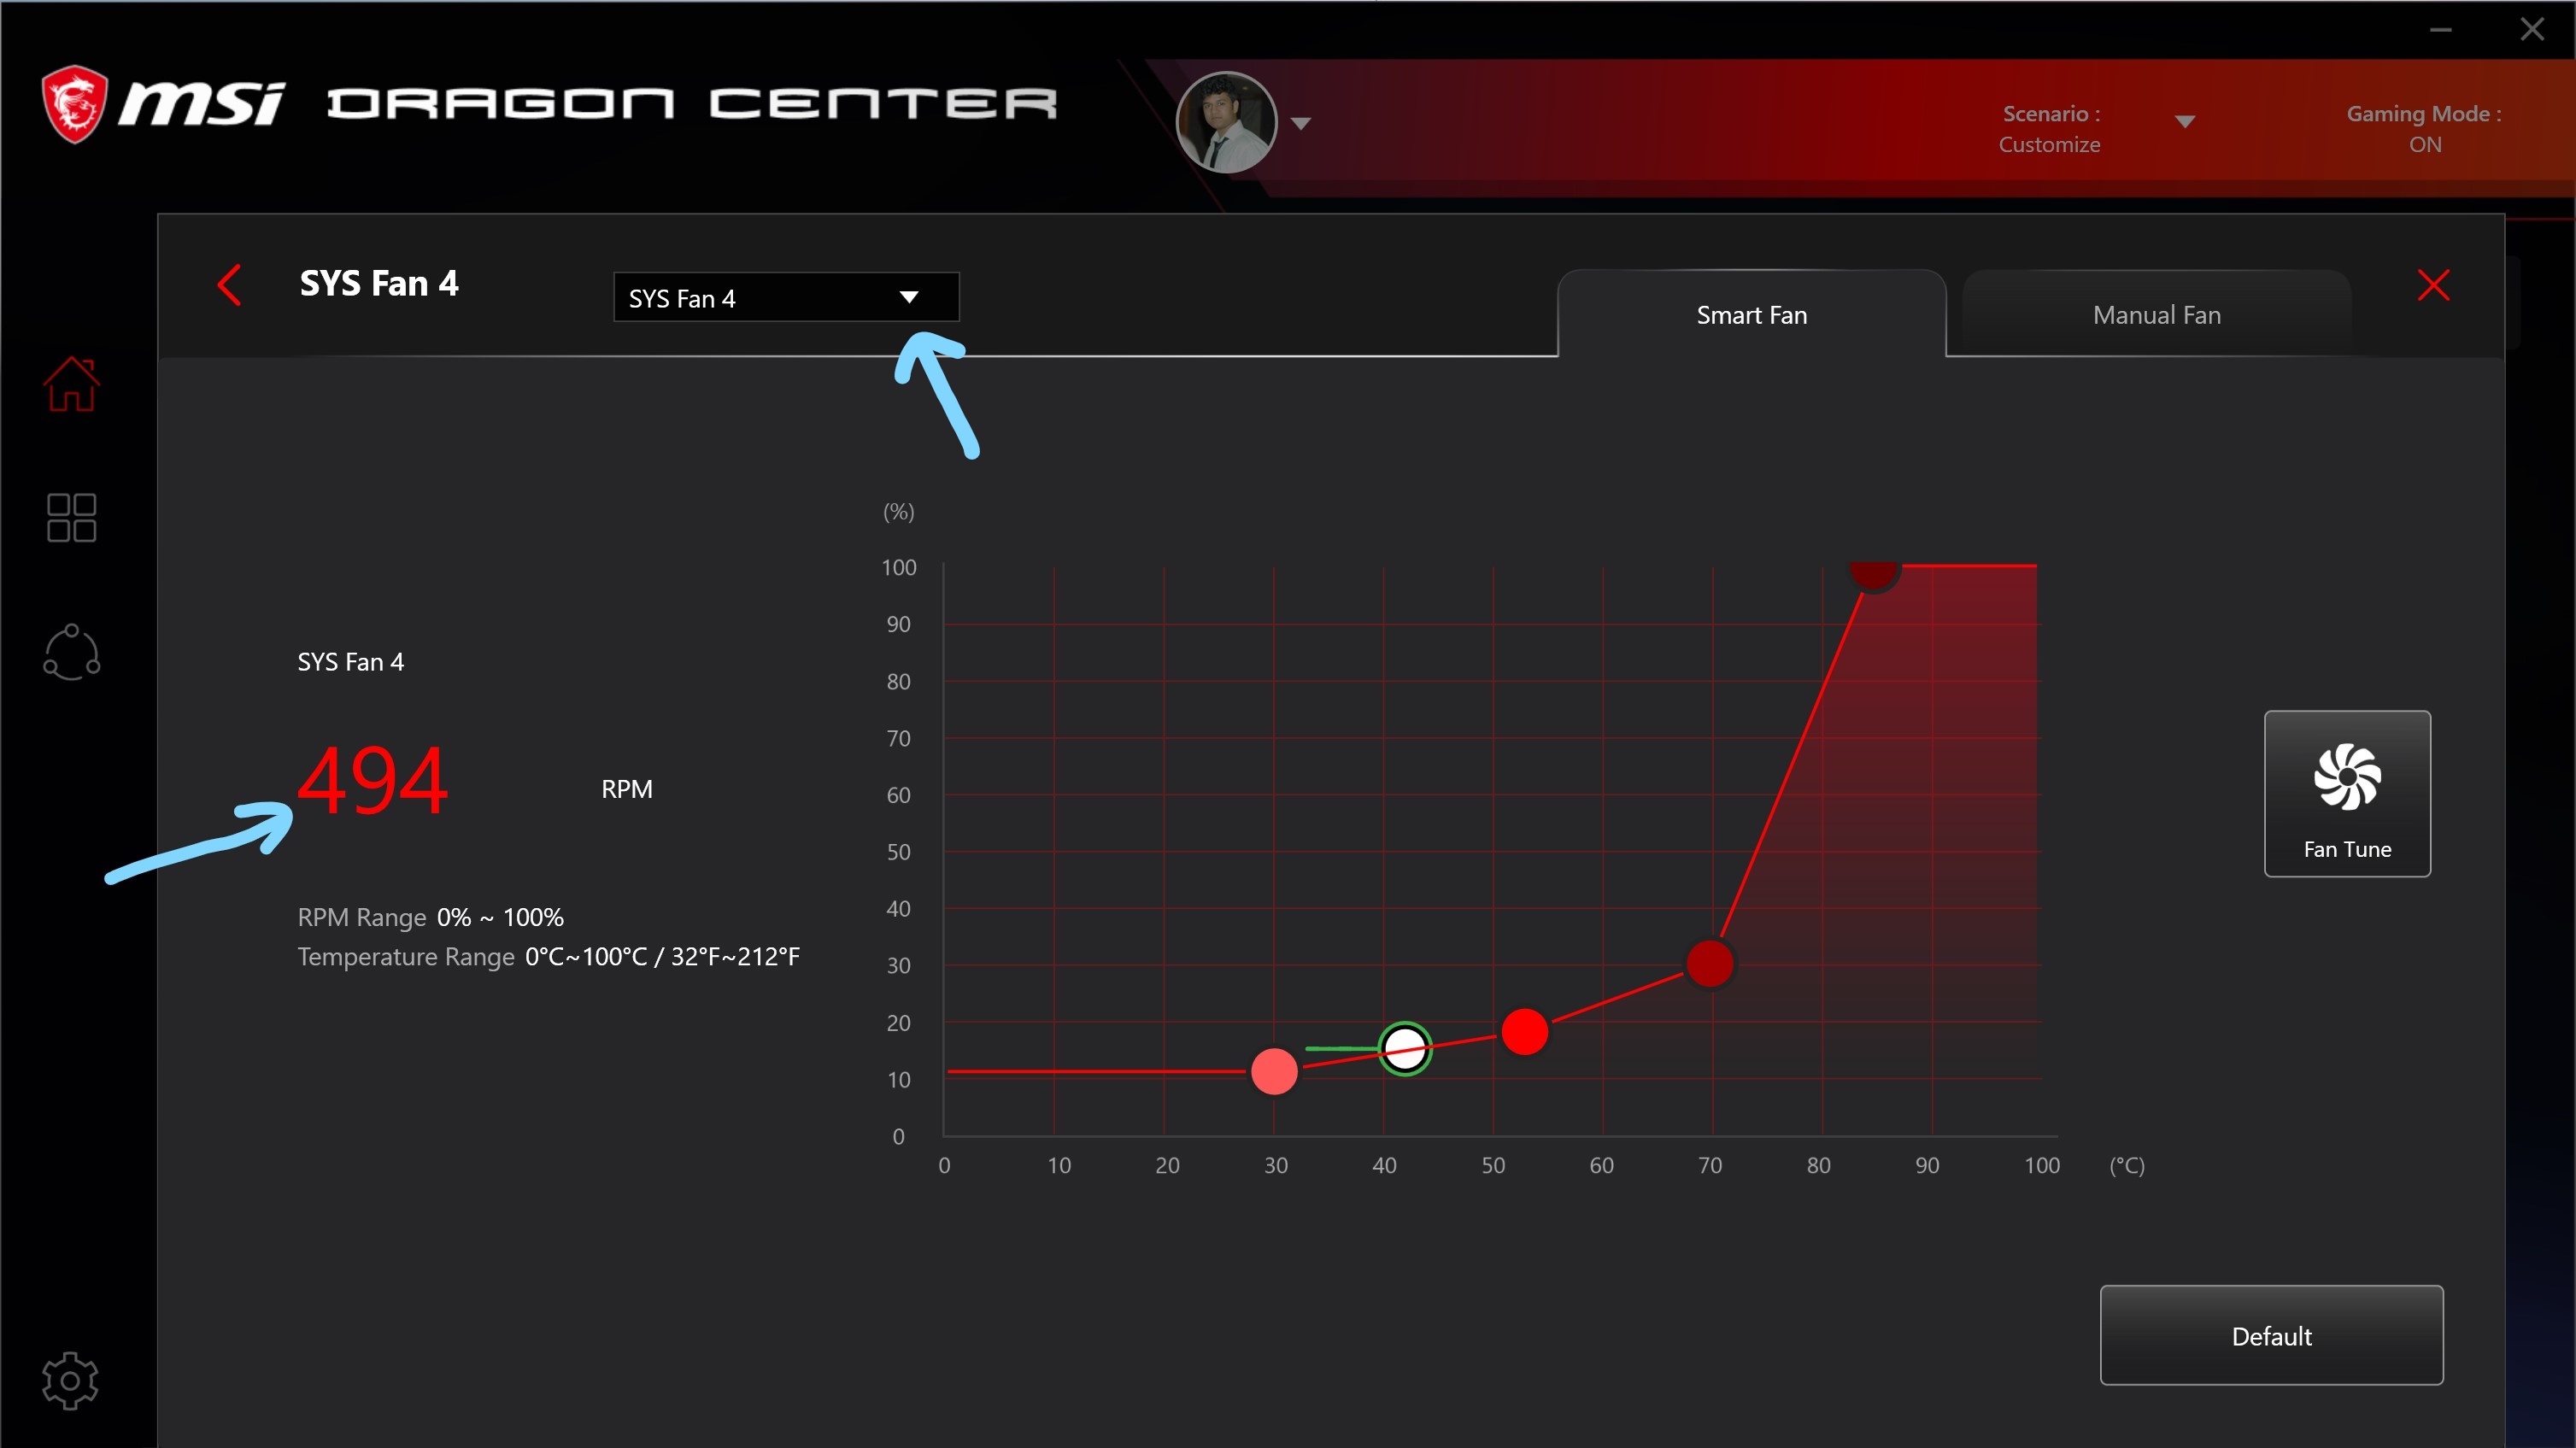
You can see the RPM of CPU Fan, PUMP Fan, but nothing in SYS Fan. I will tell you why in some time. Click on the cog icon to adjust the speed of the respective fan.
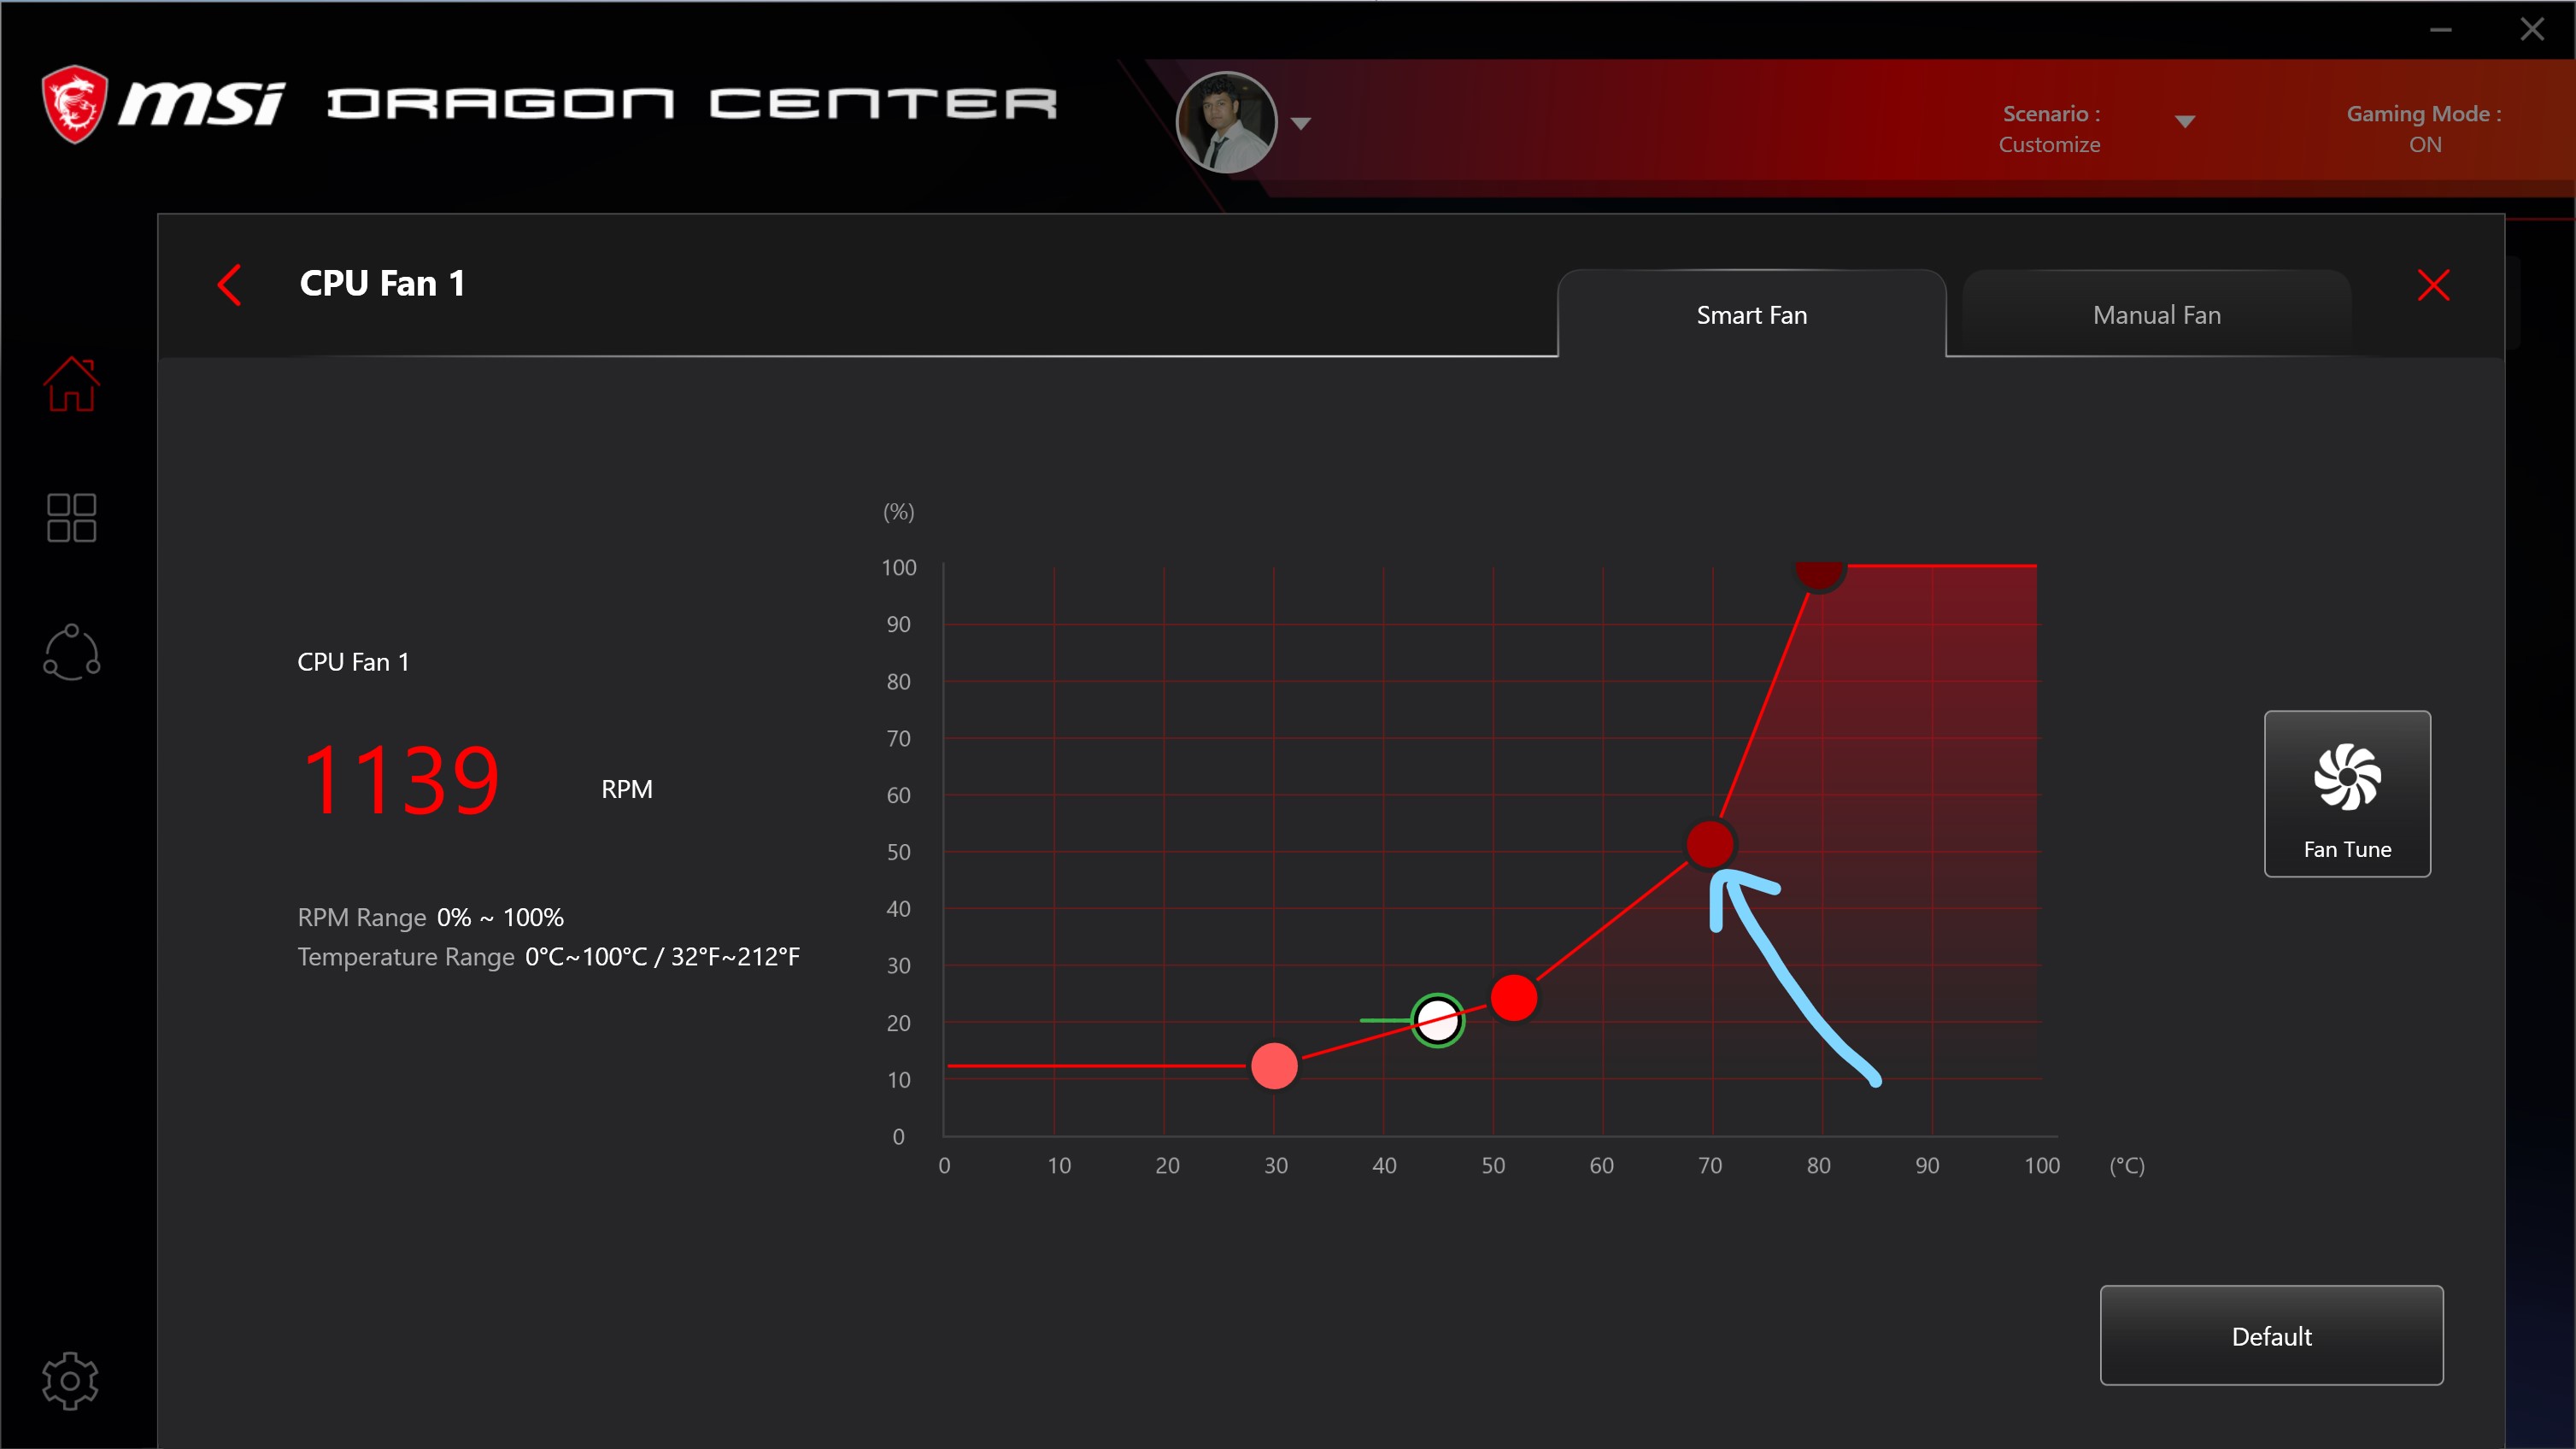
Adjust the graph as per your needs and then move on to the next fan.
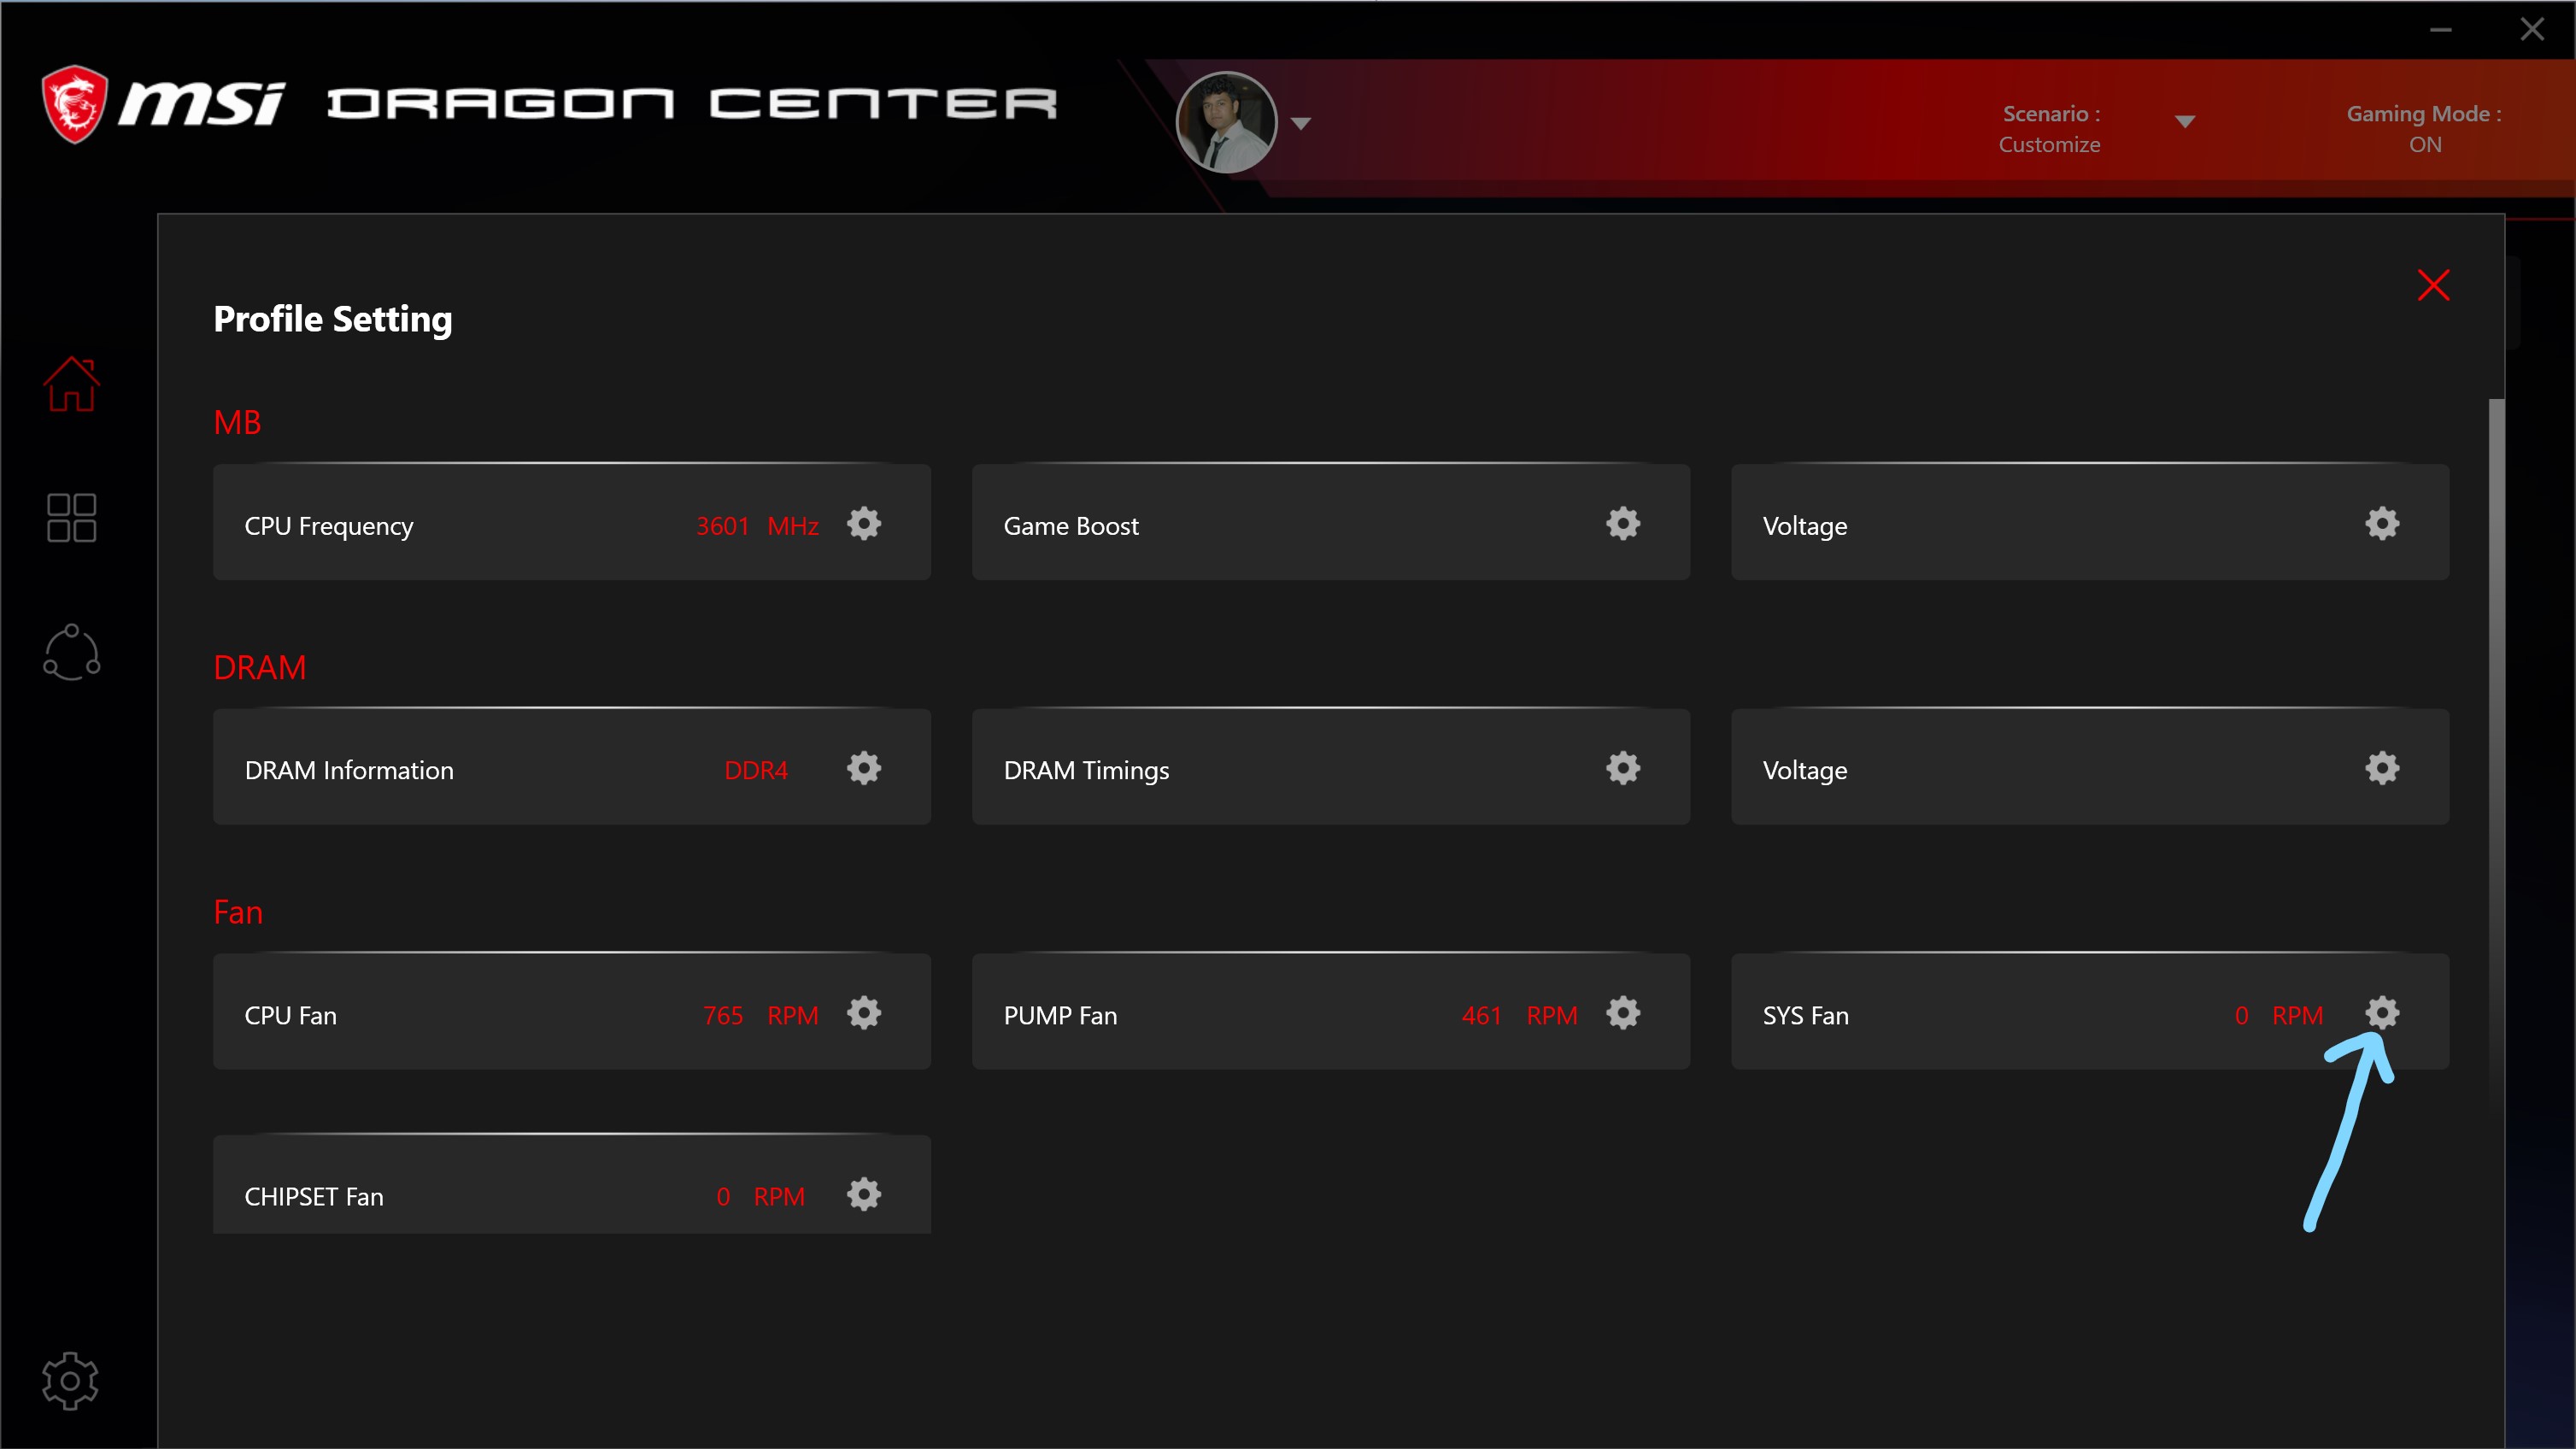
The SYS Fan shows nothing here because by default it shows the RPM of SYS Fan 1 and I have installed my fan on SYS Fan 4. Therefore, after choosing the SYS Fan 4 in the dropdown, I can see the RPM as shown below:
That’s all about controlling the fan speed. If you want to have a sneak peek at my Gaming PC then have a look at this YouTube Shorts Video - https://youtube.com/shorts/euiUbWAGq1c
