
In SwiftUI, you can force an app to open in landscape mode by configuring the supported interface orientations in your app’s target settings. Here’s a step-by-step guide to configuring interface orientations in Xcode:
- Open your Xcode project.
- In the Project navigator, select your app’s target.
- Go to the General tab.
- Under Deployment Info, you’ll see the Supported Interface Orientations section.
- Uncheck the Portrait option and check the Landscape Left and Landscape Right options. This will configure your app to support landscape orientations only.
- Save your changes.
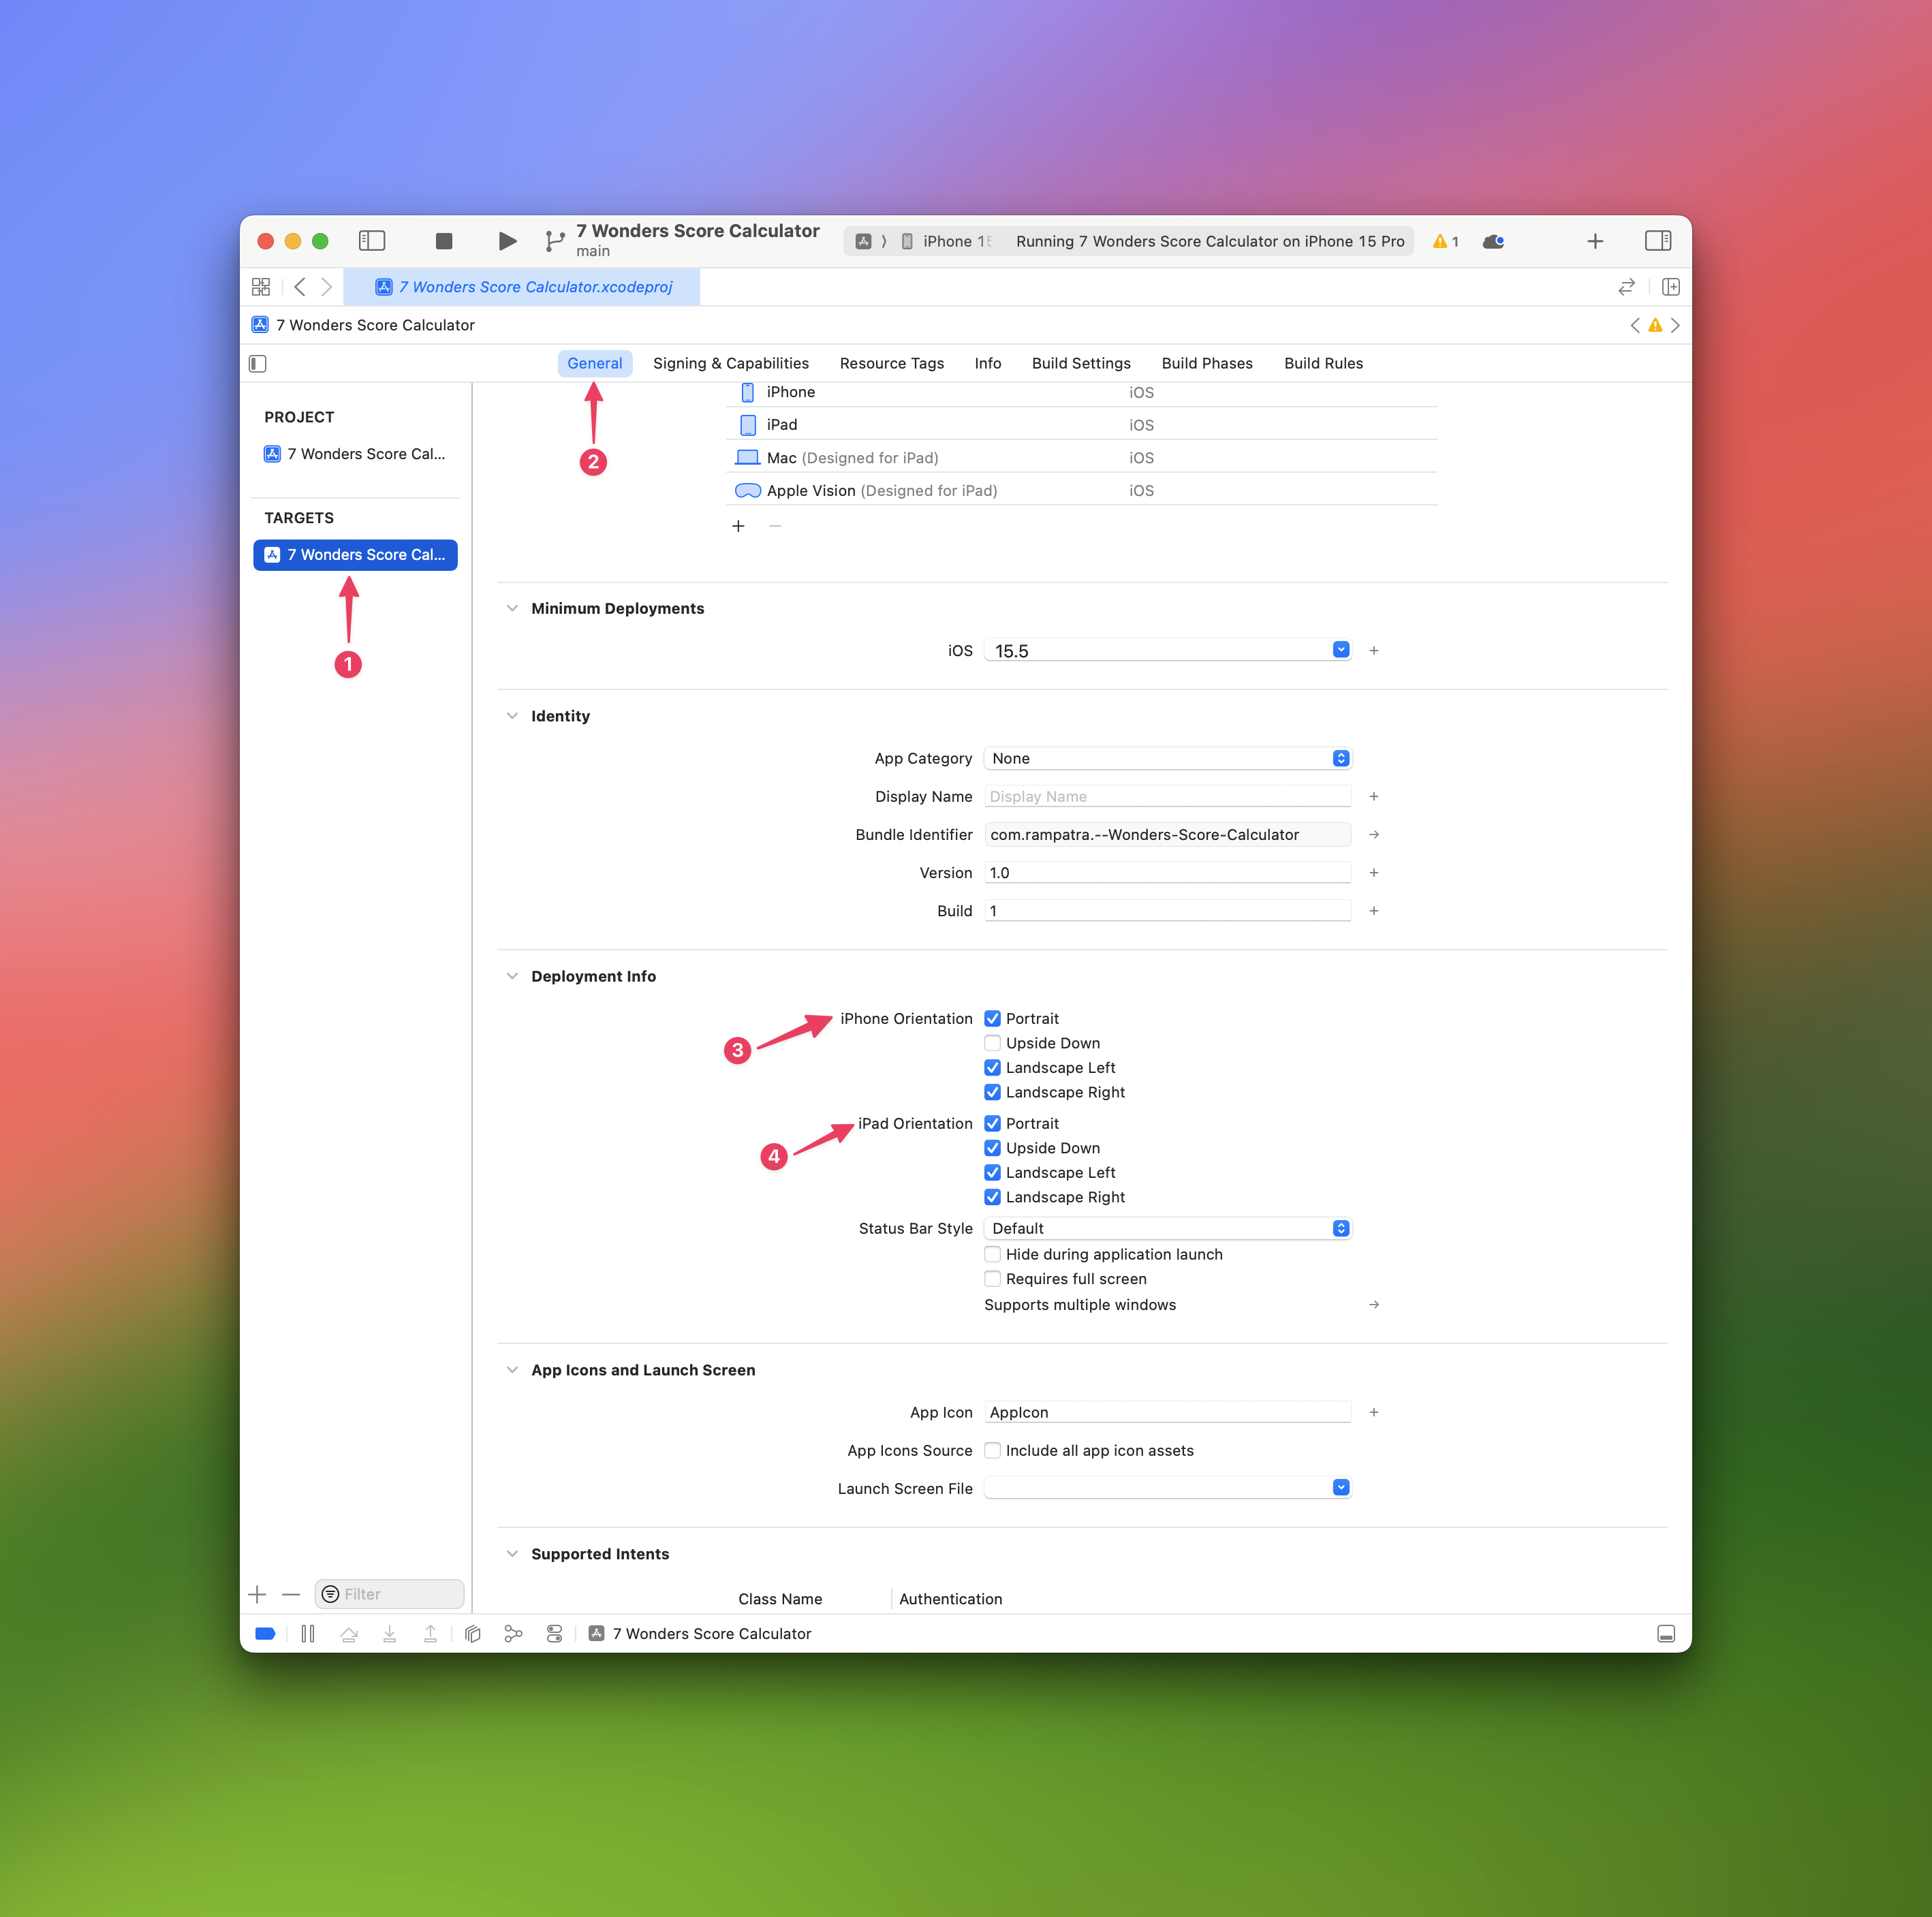
By configuring the supported interface orientations in your app’s target settings, you force the app to open in landscape mode regardless of the device’s orientation. However, please note that this approach affects the entire app and cannot be overridden on a per-view basis.
And, if you do not want this behaviour for the entire app and just want this for a specific view then you can achieve this by using the UIViewControllerRepresentable protocol in SwiftUI to wrap a UIKit view controller that supports landscape orientation.
Here’s an example of how you can do it:
- Create a SwiftUI view that wraps a UIKit view controller and conforms to
UIViewControllerRepresentable:
import SwiftUI

struct LandscapeView: View {
    var body: some View {
        LandscapeViewControllerWrapper()
            .edgesIgnoringSafeArea(.all) // Make sure the view covers the entire screen
    }
}

struct LandscapeView_Previews: PreviewProvider {
    static var previews: some View {
        LandscapeView()
    }
}
- Create a
UIViewControllersubclass that supports landscape orientation:
import UIKit

class LandscapeViewController: UIViewController {
    override func viewDidLoad() {
        super.viewDidLoad()

        // Force landscape orientation
        UIDevice.current.setValue(UIInterfaceOrientation.landscapeLeft.rawValue, forKey: "orientation")
    }

    override var supportedInterfaceOrientations: UIInterfaceOrientationMask {
        return .landscape
    }

    override var shouldAutorotate: Bool {
        return true
    }
}
- Create a SwiftUI wrapper for the
LandscapeViewControllerusingUIViewControllerRepresentable:
import SwiftUI

struct LandscapeViewControllerWrapper: UIViewControllerRepresentable {
    func makeUIViewController(context: Context) -> LandscapeViewController {
        return LandscapeViewController()
    }

    func updateUIViewController(_ uiViewController: LandscapeViewController, context: Context) {
        // Update the view controller if needed
    }
}
Now, when you navigate to the LandscapeView in your SwiftUI app, it will be displayed in landscape mode while the rest of your app remains unaffected. This approach allows you to control the orientation of individual views within your SwiftUI app.
