Submitting your app to the Apple App Store is somewhat “straightforward”, however, if you want to export your app to list it on a 3rd party app store or sell it directly to your customers then you have to notarize your app.
To be fair, there are only a couple of extra steps that you need to do for notarization but I keep forgetting it for some reason when submitting my app, Presentify, to Setapp. Therefore, I am listing down the steps with screenshots so that I don’t scour the internet every time I release an update.
- Make an archive of your app by going to
Product > Archive -
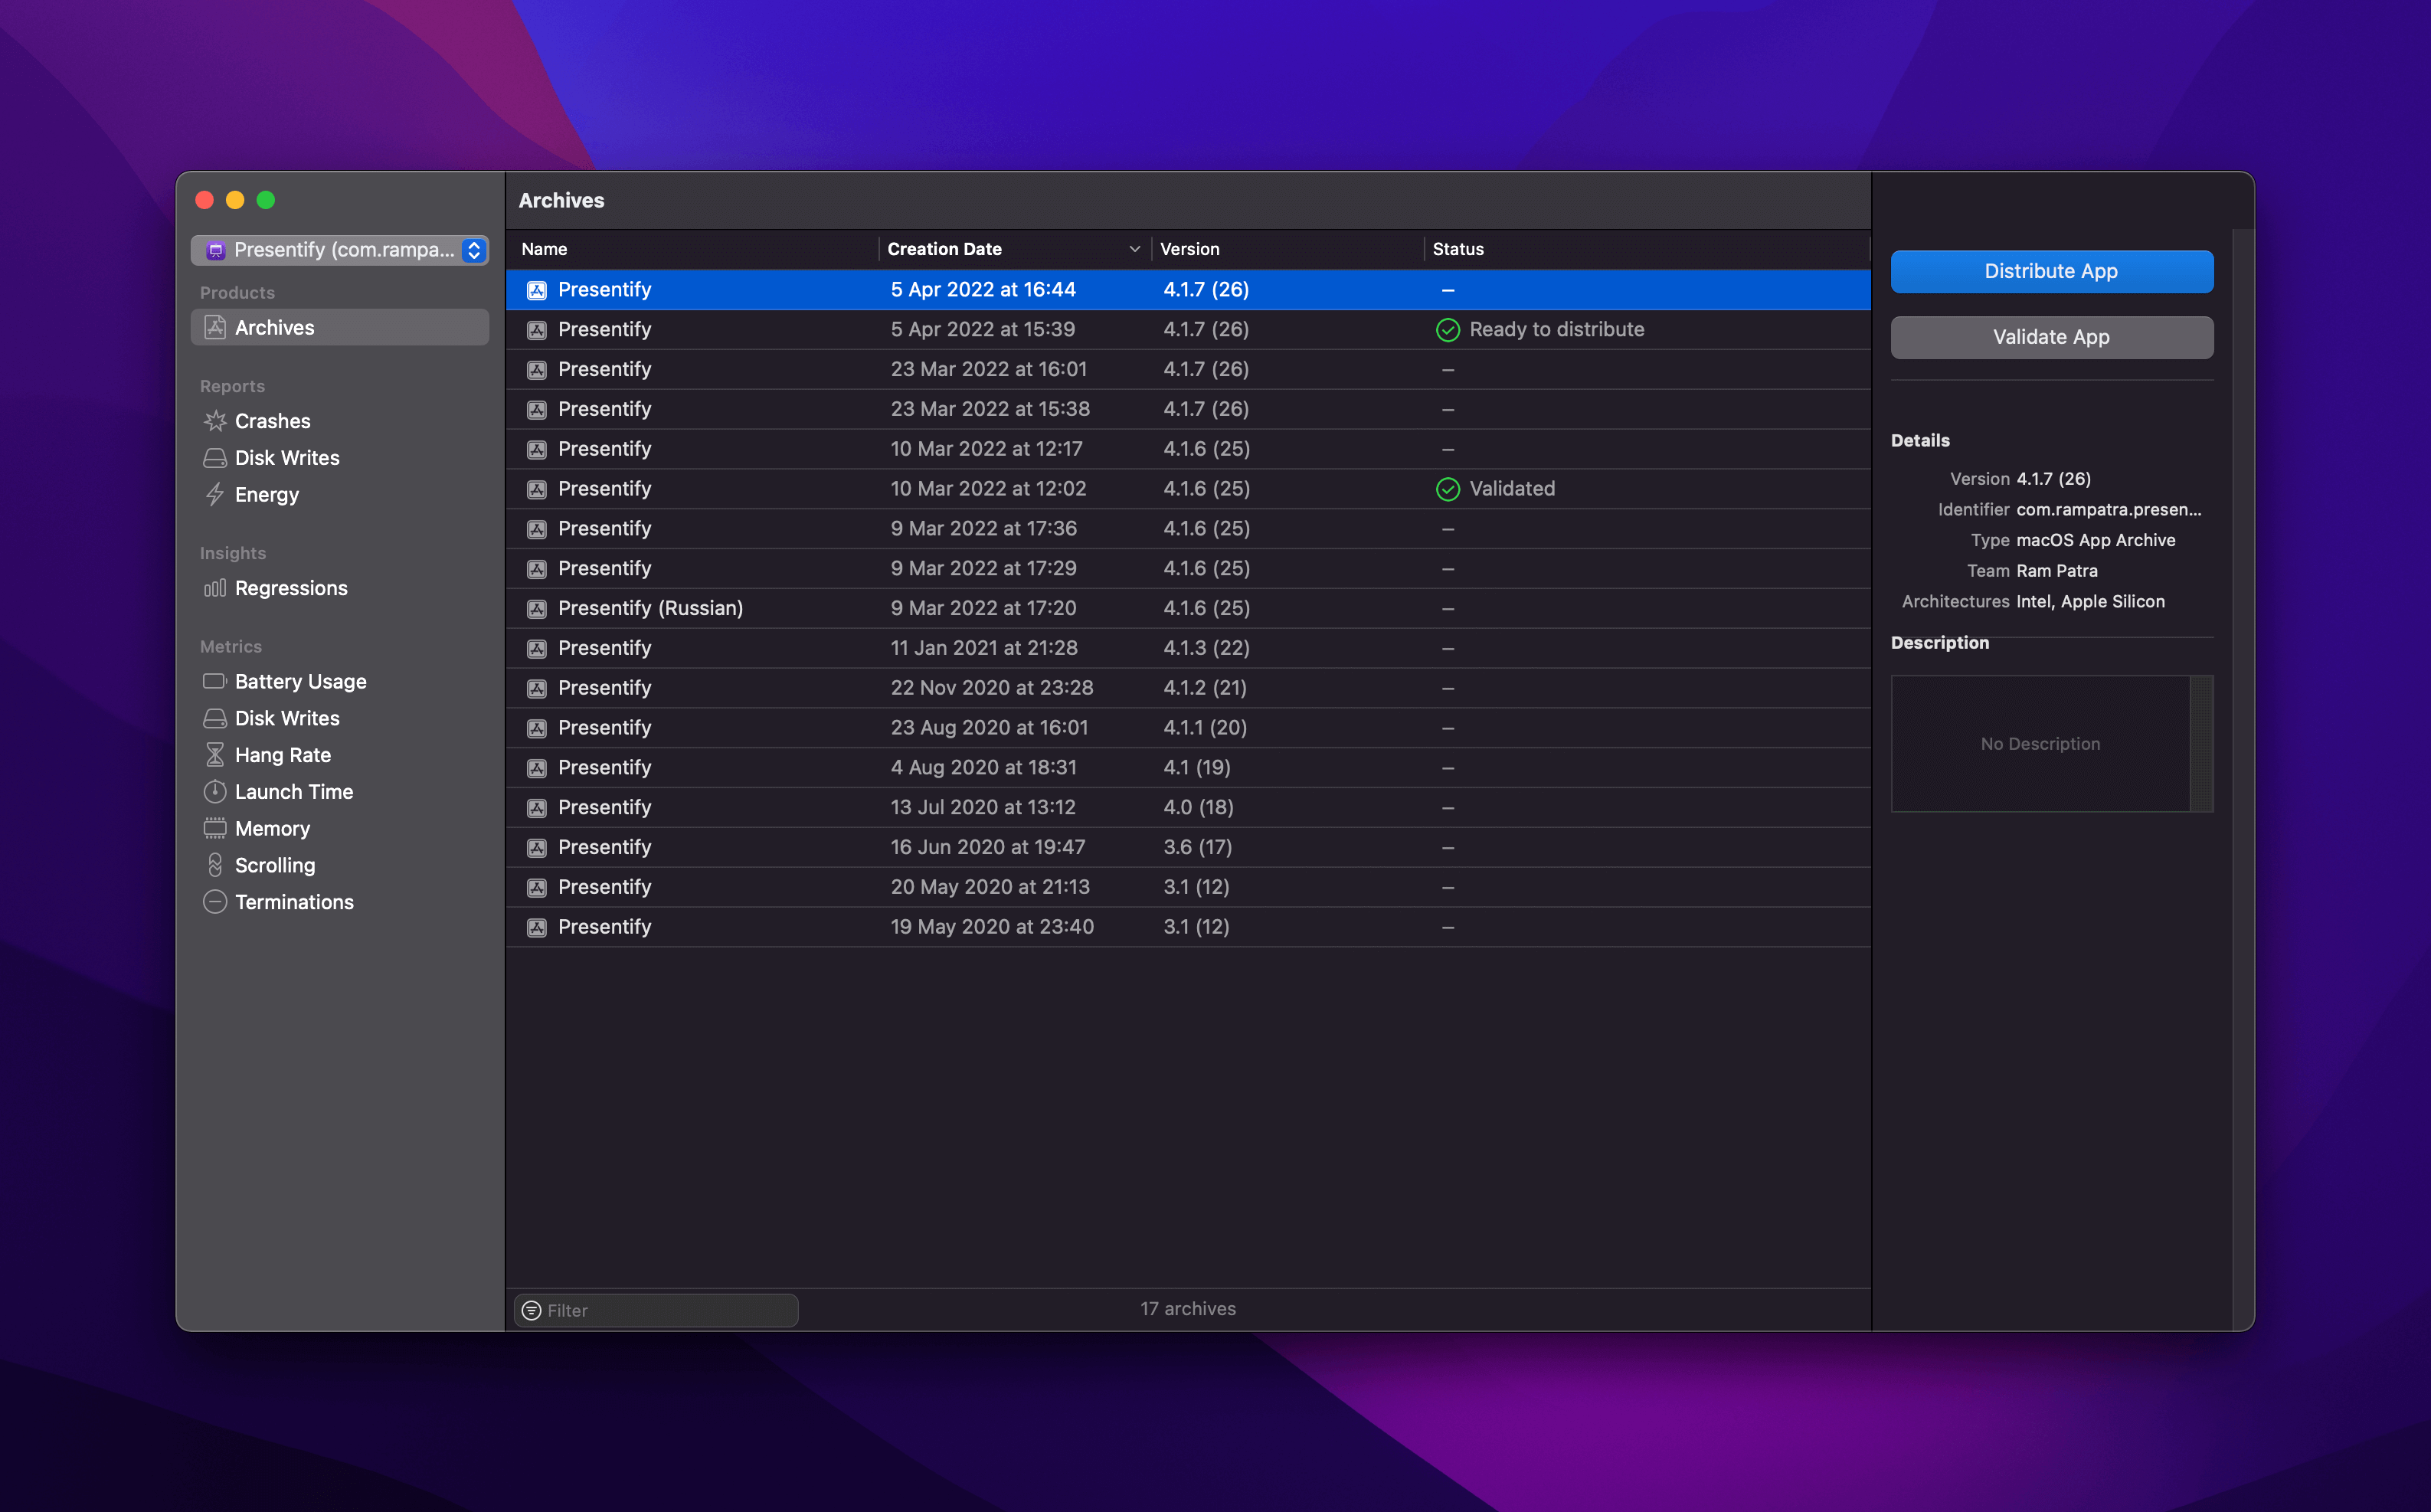
After the archive is done, Xcode would automatically show all the archives like below:

If this window doesn’t show up automatically then you can manually open this by going to
Window > Organizer. - Select the version you want to notarize and then click on
Distribute Appbutton on the right. -
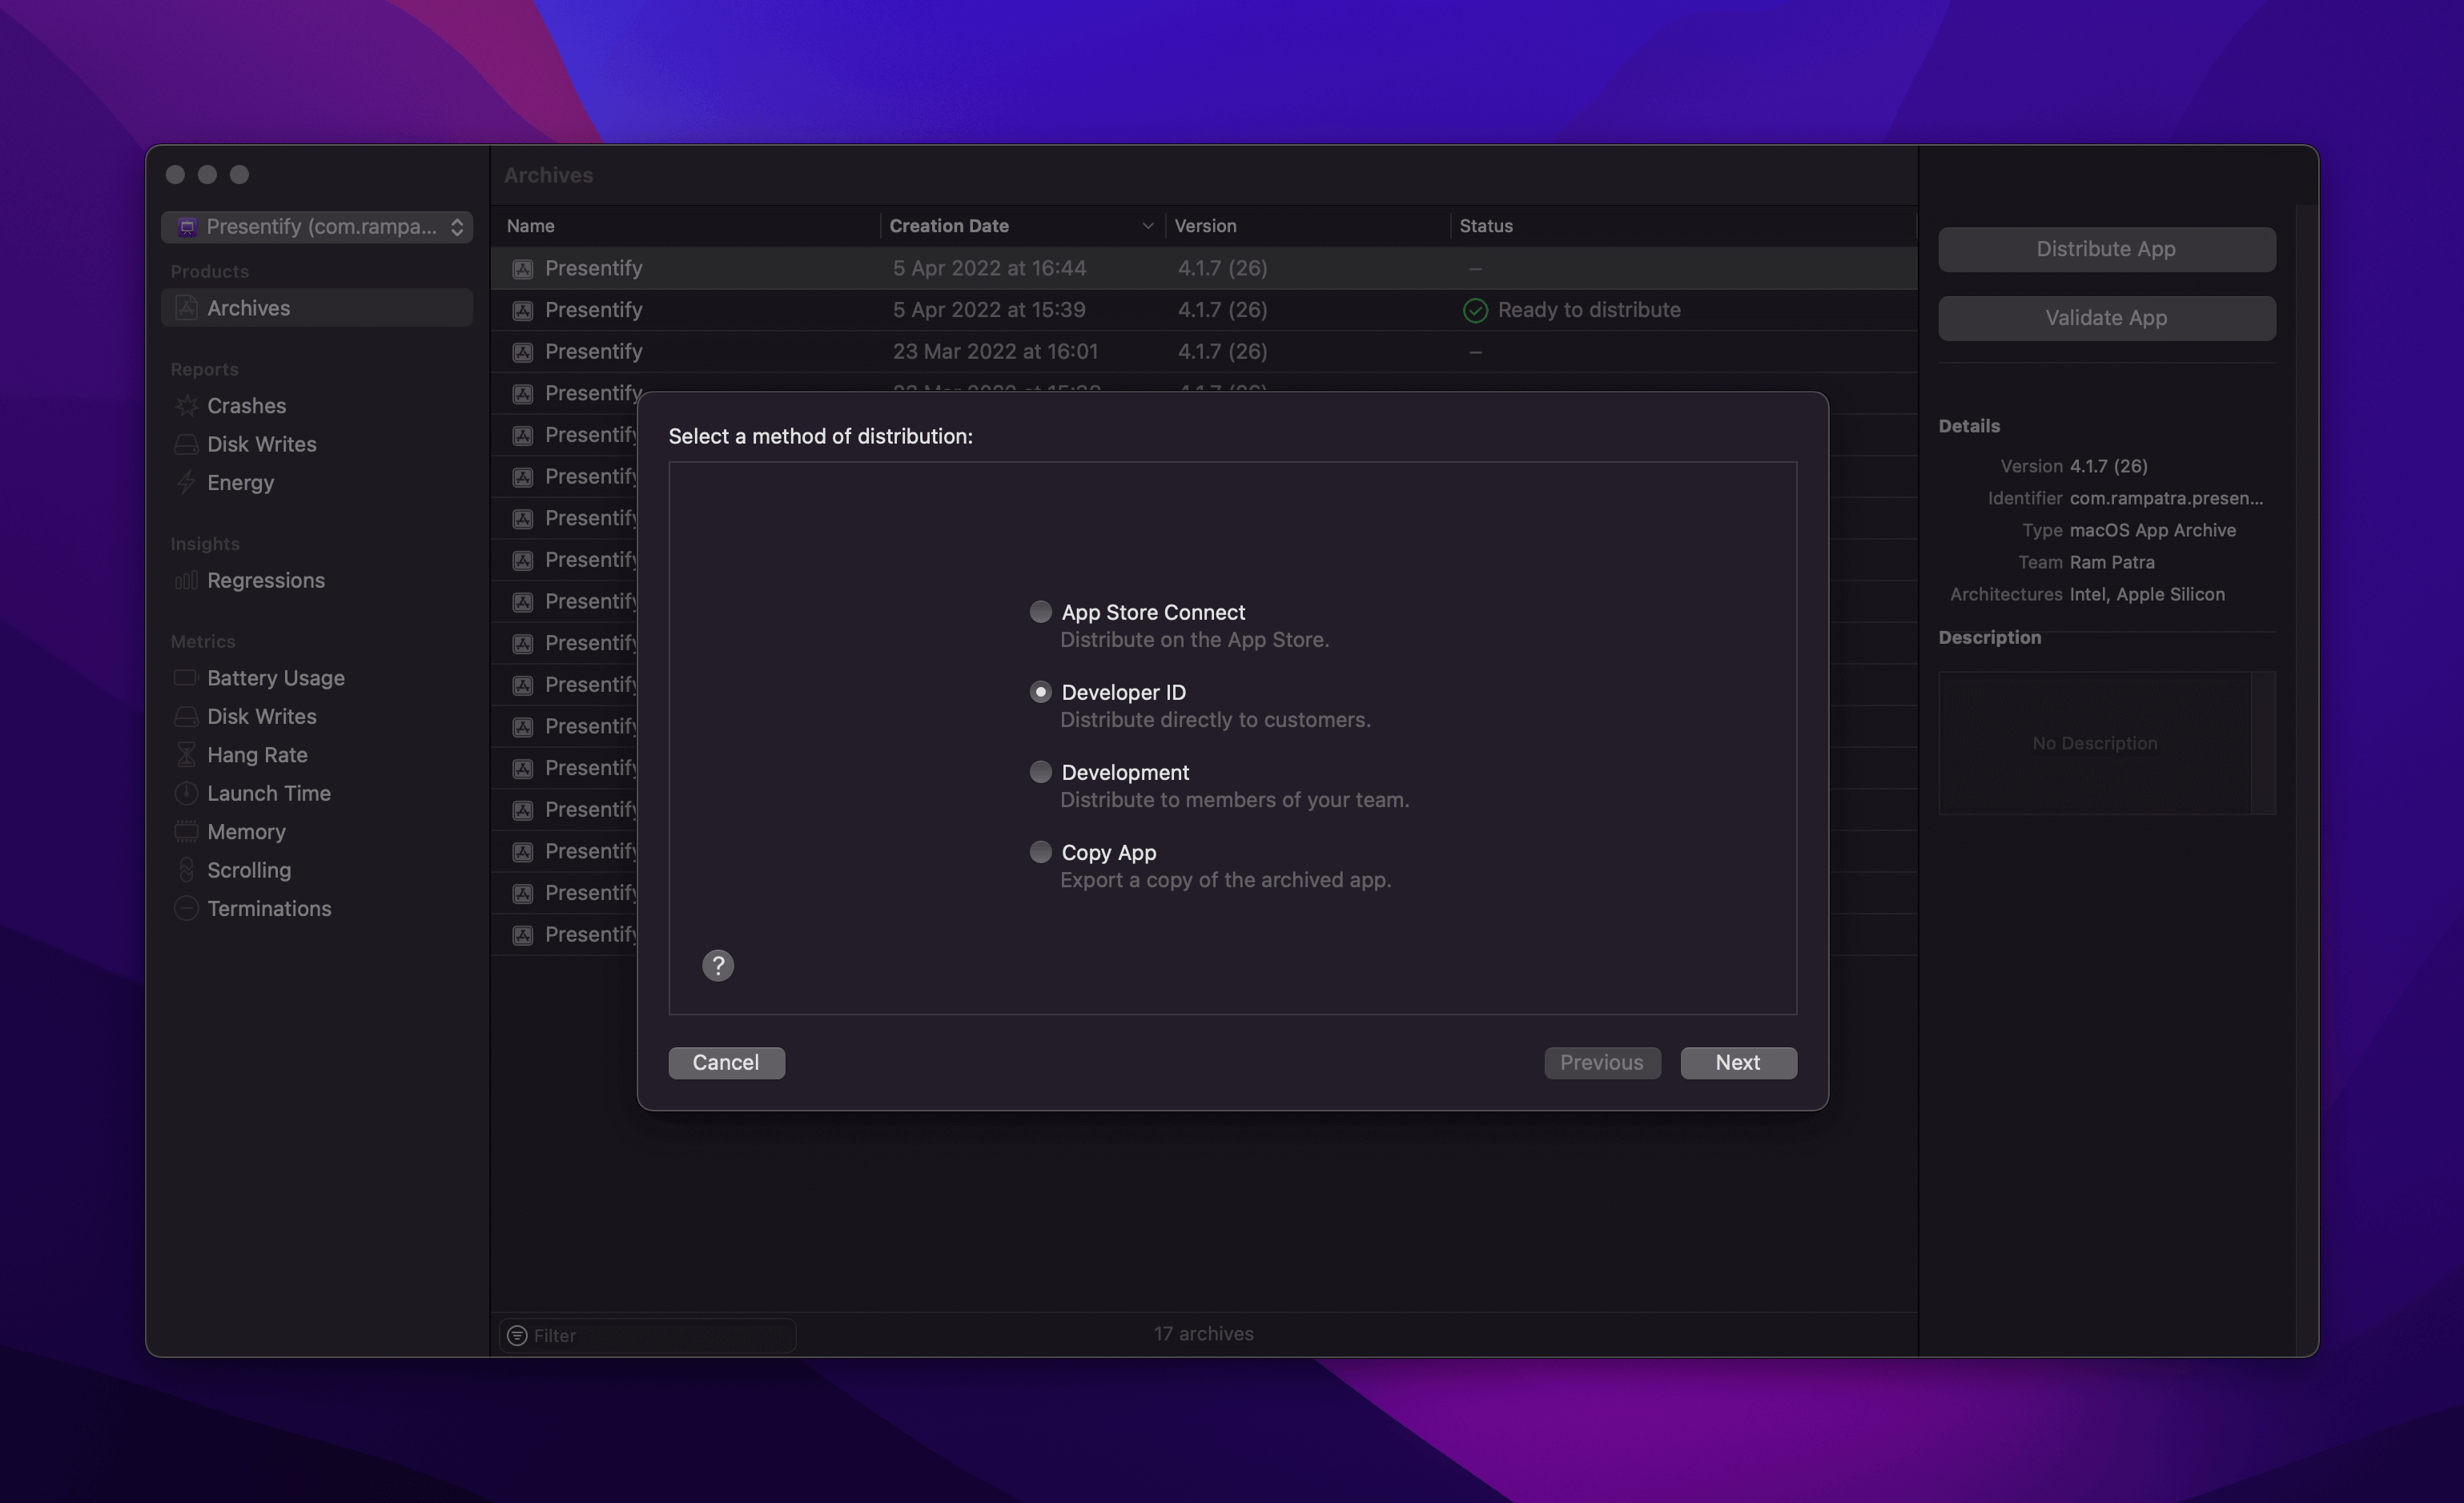
Select
Developer IDor as appropriate for your use case.
- Click
Nextand then selectUploadto submit the app for notarization. - Choose the appropriate signing method (Automatic/Manual).
- After verifying all the details on the final screen, click on
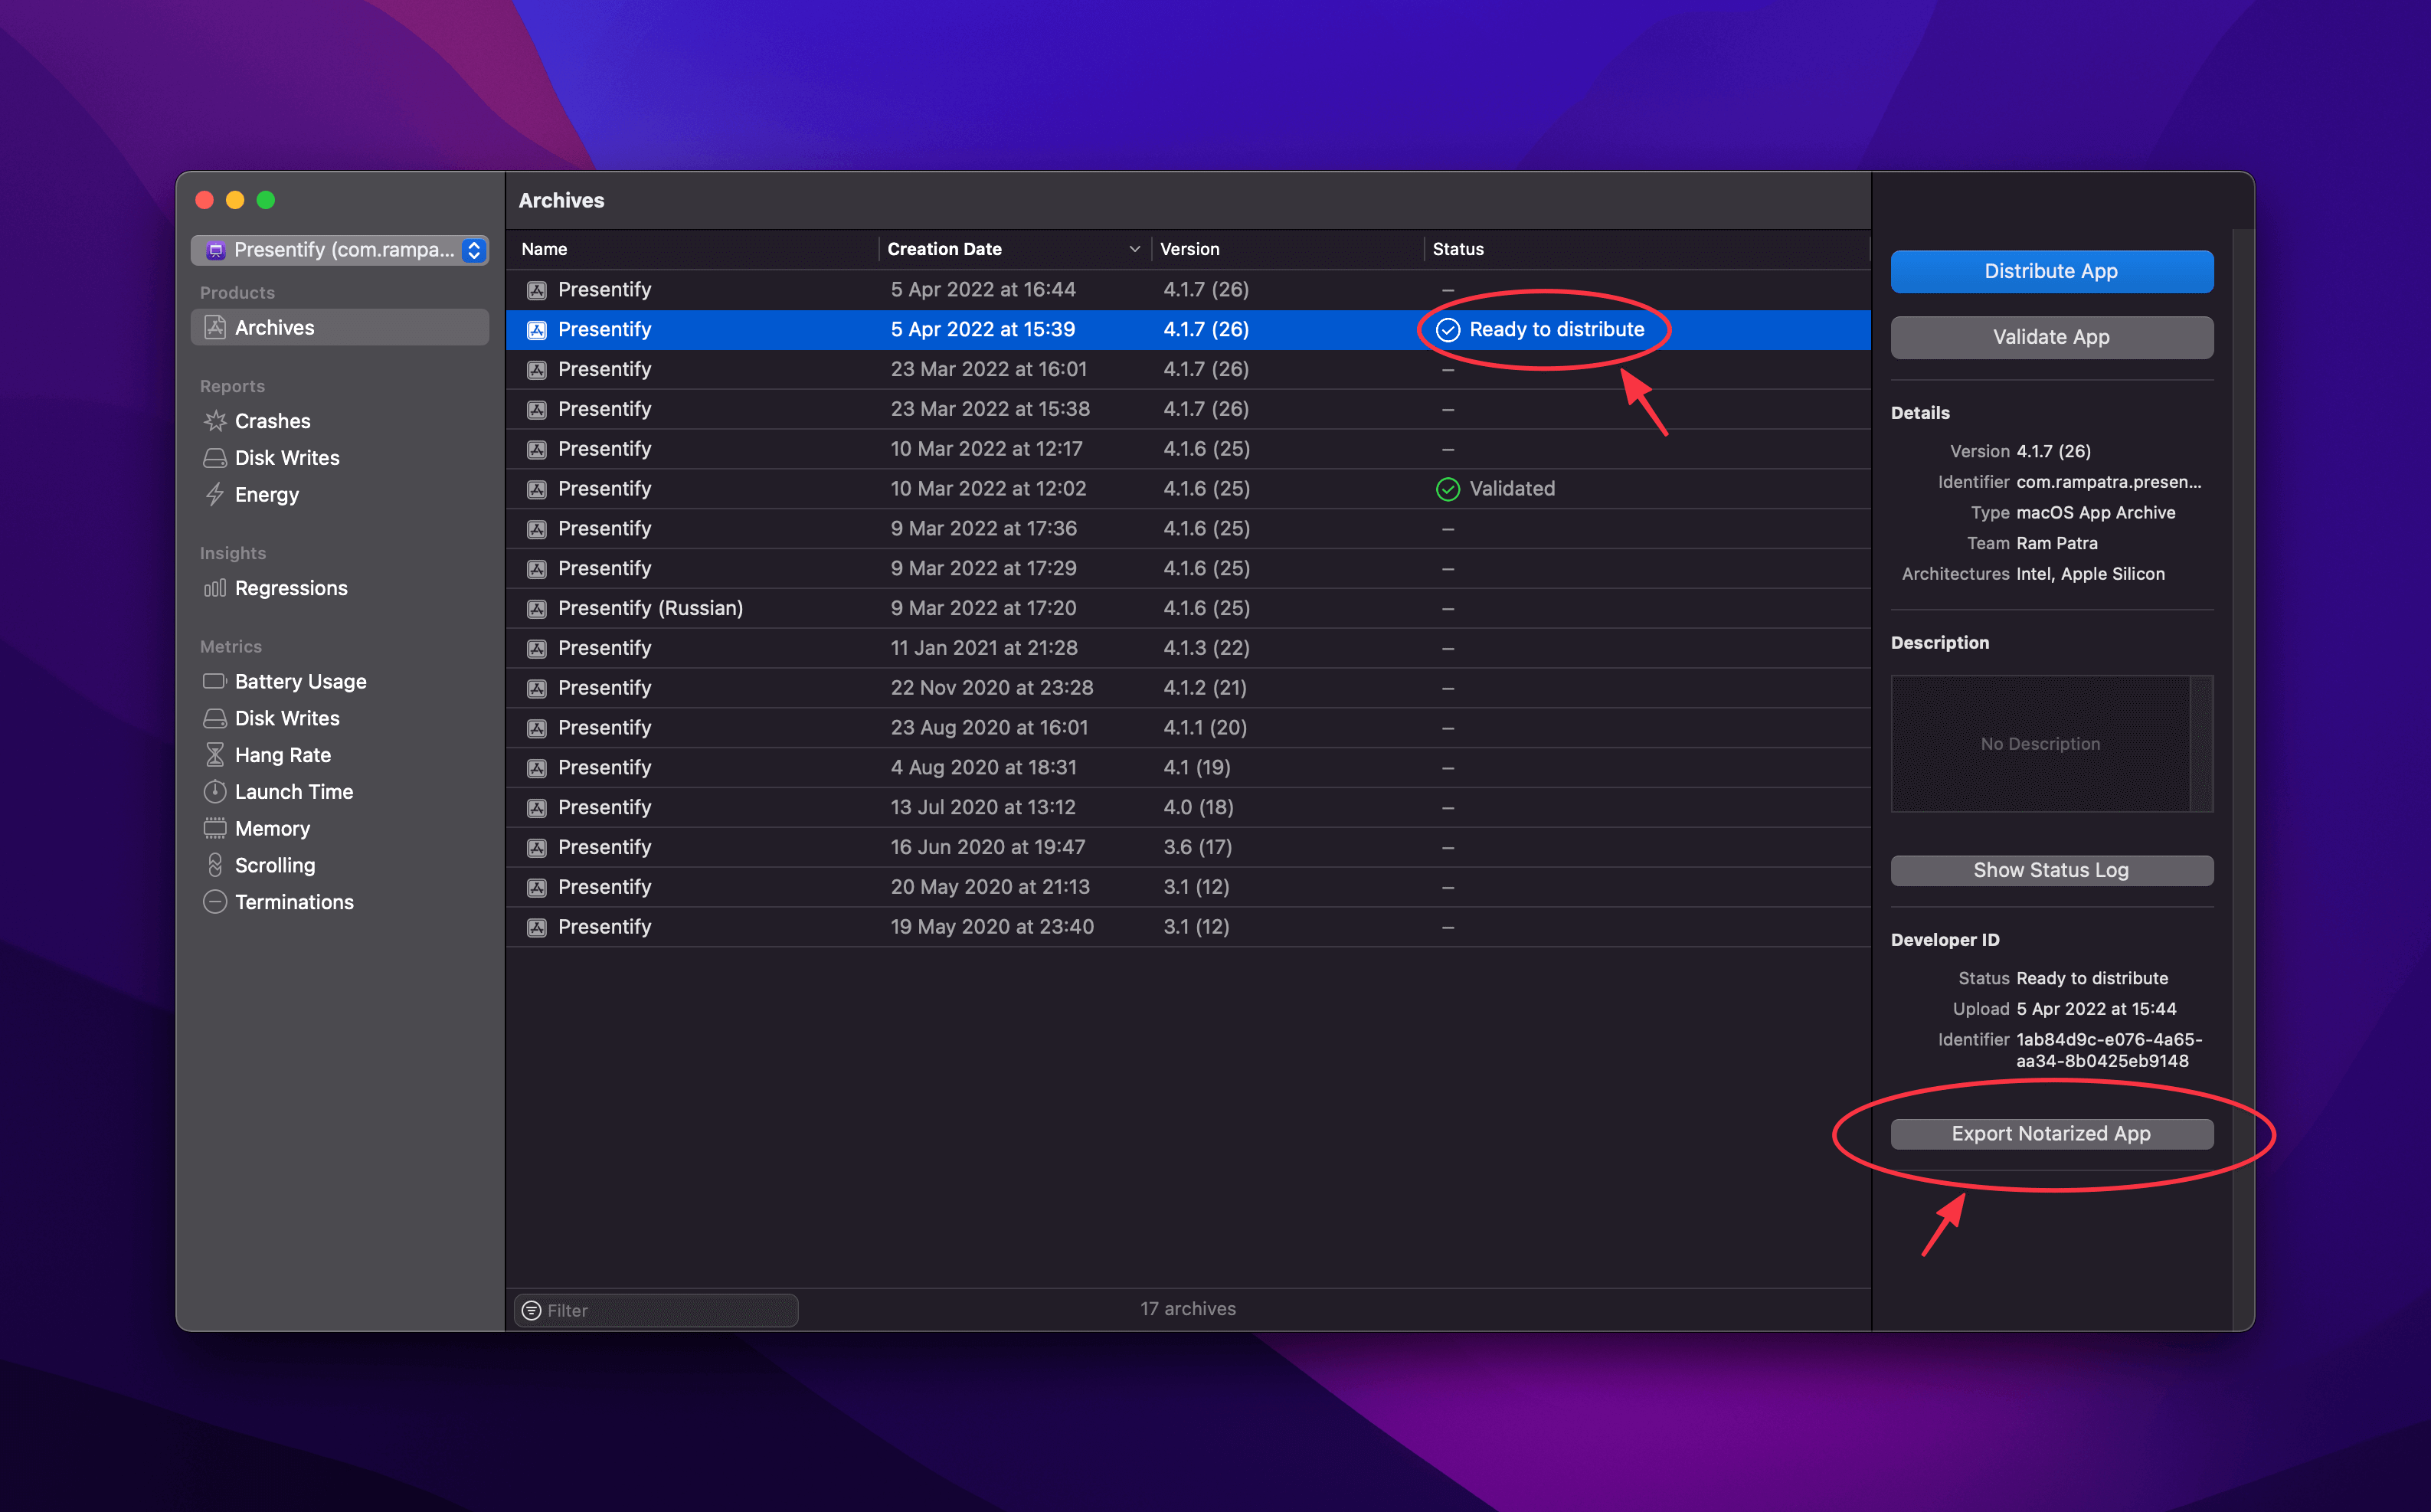
Upload. - Wait for a couple of minutes for your app’s status to change to
Ready to distribute. -
Once the status has changed, click on
Export Notarized Appbutton at the bottom right corner like shown below and you’re done.